2.4. Explore Map Features with a WMS GetFeatureInfo Popup
With GetFeatureInfo, WMS provides an easy way to query a map for feature info. Using OpenLayers and GeoExt makes it easy to access this information from within our application
2.4.1. The OpenLayers WMSGetFeatureInfo control and GeoExt Popups
Let’s get familiar with OpenLayers.Control.WMSGetFeatureInfo control and GeoExt.Popup. Also, the Ext.grid.PropertyGrid will be useful to display the feature info in a nice grid - without the need to create another store manually.
Tasks
For the popup, we need to include a CSS file in our document’s head, which provides the styles for the popup’s anchor:
<link rel="stylesheet" type="text/css" href="geoext/resources/css/popup.css">
Note
GeoExt provides a CSS file which contains all styles that its widgets might require. So if you want to avoid having to worry about required CSS resources, you can include
geoext-all.css(orgeoext-all-debug.cssfor the developer version we are using here) instead ofpopup.css.Now we can create the control. The code below should be added at the end of the application’s script block:
controls.push(new OpenLayers.Control.WMSGetFeatureInfo({
    autoActivate: true,
    infoFormat: "application/vnd.ogc.gml",
    maxFeatures: 3,
    eventListeners: {
        "getfeatureinfo": function(e) {
            var items = [];
            Ext.each(e.features, function(feature) {
                items.push({
                    xtype: "propertygrid",
                    title: feature.fid,
                    source: feature.attributes
                });
            });
            new GeoExt.Popup({
                title: "Feature Info",
                width: 200,
                height: 200,
                layout: "accordion",
                map: app.mapPanel,
                location: e.xy,
                items: items
            }).show();
        }
    }
}));
Now let’s examine the code we just added a bit.
Note the
eventListenersconfig option for the WMSGetFeatureInfo control. We listen to the “getfeatureinfo” event, which is fired every time we get back feature information from the WMS. For each feature that we get back, we create a property grid:Ext.each(e.features, function(feature) { items.push({ xtype: "propertygrid", title: feature.fid, source: feature.attributes }); });
The PropertyGrid is a very convenient component for a WMSGetFeatureInfo control configured with an
infoFormatthat returns something we can parse (i.e. not plain text or html). We do not need to configure this component with a store (like we did for the WMSCapabilities grid), we just pass it an arbitrary object (the attributes of a feature here) assourceconfig option, and it will create a store internally and populate the grid with its data.We can easily put a popup on the map and anchor it to the position we clicked on the map:
new GeoExt.Popup({
    title: "Feature Info",
    width: 200,
    height: 200,
    layout: "accordion",
    map: app.mapPanel,
    location: e.xy,
    items: items
}).show();
With the
locationconfig option, we anchor the popup to the position where the click occurred (e.xy). We give it an “accordion” layout, and the items are the property grids we created above.
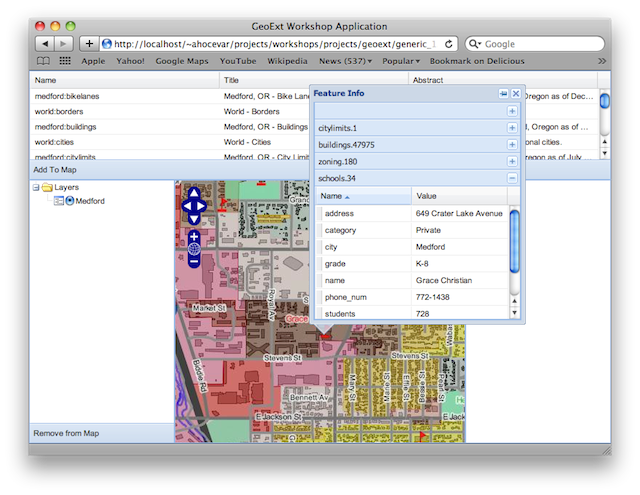
Map with a popup populated from WMS GetFeatureInfo
2.4.2. Conclusion
You have successfully created a WMS browser application! The whole application has about 120 lines of code. Not much when you consider how many features we were able to pack into it. And it wasn’t that hard to develop, was it?